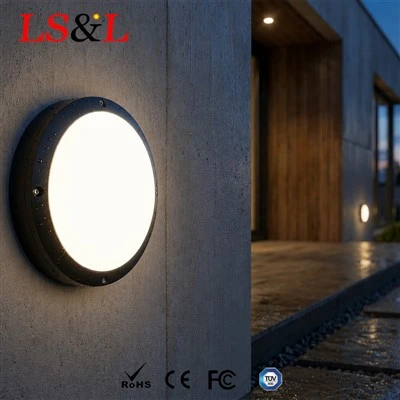
Many overseas factory clients ask for proper installation guidance after receiving their goods. Over years in lighting foreign trade, I have seen many led bulkhead light units fail inspections due to poor fitting, broken waterproof seals or incorrect lighting angles. Below I walk through the full installation process and key notes for industrial sites.
1. Pre-site survey and product verification
Before starting work, confirm mounting positions, power circuits and ambient conditions. For damp, dusty outer workshop walls, check the ingress rating first. An IP65 bulkhead light suits most standard industrial environments. Leave enough clearance away from pipes and high-temperature machinery. Set the mounting height carefully to balance light coverage and impact protection. For emergency variants, verify connection to permanent live circuits, separate from switched lighting circuits.
2. Base marking and drilling
Mark drilling holes according to the base template. Ensure the wall substrate is solid; use suitable expansion anchors for hollow walls. Clear dust out from holes before fixing the base. Do not peel the protective film off the gasket early, to stop dust and debris sticking to the seal and ruining waterproof performance. Tighten screws evenly and avoid uneven pressure that warps the housing.
3. Wiring best practices
Always cut off power before wiring. Clearly separate live, neutral and earth wires. For emergency or sensor versions, distinguish permanent live and control cables. Secure terminals tightly and keep copper conductors fully covered. Arrange cables neatly without squeezing, which prevents insulation damage from heat over time. Improper wiring is a leading cause of short-circuit faults discovered later on site.
4. Closing and sealing inspection
Once wiring is finished, fit the front cover and fasten all screws sequentially. A common mistake when installing a bulkhead light is uneven screw torque, which shifts the rubber seal and breaks waterproof integrity. Double-check that the gasket stays in place and is not pinched. This step is critical for outdoor or wet areas, as water ingress will quickly damage the driver.
5. Power-on testing and acceptance
After full installation, run a no-load power test. Check brightness and flicker for standard models, test detection range and hold time for microwave sensor versions, and simulate power failure for emergency units to confirm smooth switching. Log fixture IDs and locations for future maintenance. Shut down power immediately if any abnormality appears; do not leave faulty lights running.
6. Ongoing maintenance reminder
Installation is not the final step. Clean dust off the surface regularly and never spray the fixture directly with high-pressure water. Check for cracked housings and loose screws during routine visits.

If you are planning factory lighting for new builds or retrofits and need layout advice or product selection, send over your site drawings and operating conditions. I can provide installation guidance and a tailored solution to help you pass inspection smoothly.